

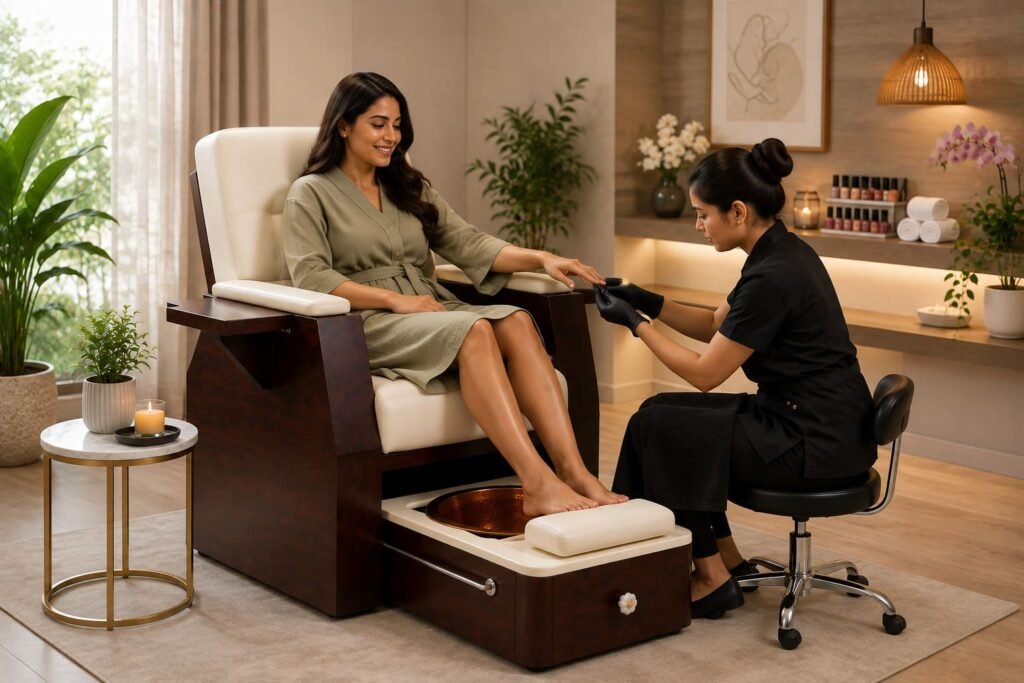

A small salon can create an elegant pedicure area without dedicating an entire room to it. The trick is to build the space around luxury pedicure chairs and make every surrounding element serve a purpose. A separate soaking area, compact trolley, thoughtful lighting and coordinated finishes can make a small corner feel like a deliberately designed treatment space.
A DIY setup also gives you flexibility. Instead of committing to permanent fixtures, you can arrange the area according to your salon’s available space and service routine. This approach works particularly well when you want a polished pedicure corner without carrying out major renovation work.
Start by Mapping the Pedicure Corner
Begin with the luxury pedicure chairs, rather than decorative pieces. The chair will determine how much usable floor space remains for the technician, soaking area and client movement.
Measure the chair in both its upright and reclined positions. Mark the footprint on the floor with removable tape before bringing in other furniture. This lets you see whether the proposed arrangement works in real life rather than relying only on measurements.
A pedicure station generally needs space for the chair, foot area, technician and circulation. Planning only for the chair can leave the working area feeling cramped. Use this DIY layout test:
- Mark the chair footprint with masking tape.
- Recline the chair and check its full movement.
- Place a temporary stool where the technician will sit.
- Mark the proposed soaking area.
- Walk through the space from the entrance to the chair.
- Check that the technician can move without repeatedly stepping around furniture.
- Keep frequently used supplies within easy reach.
For a small salon, avoid filling every empty section of the floor. Leaving clear movement space can make the entire corner feel more open.
Create a Separate Soaking Station
Once the chair is positioned, plan the soaking area around it. A separate foot bowl can give you more flexibility when you do not want the entire treatment corner built around a fixed basin.
Place the bowl where the technician can access it easily without stretching or repeatedly moving between stations. At the same time, keep clean towels, tools and other dry supplies away from the wet area.
Think of the setup as three connected zones: the client, the technician and the soaking area.
| Zone | What goes here | DIY setup idea |
| Client zone | Luxury pedicure chairs | Keep the chair as the visual and functional anchor |
| Soaking zone | foot soak bowl | Place it close enough for easy access during treatment |
| Technician zone | Stool and trolley | Keep regularly used products within reach |
| Storage zone | Towels and supplies | Use a compact cabinet, shelf or trolley |
| Finishing zone | Polish and finishing products | Keep these together so the final stage stays organised |
This arrangement also makes resetting the station simpler. The bowl can be emptied and cleaned without disturbing the rest of the treatment area, while supplies remain organised in their designated places.
Add DIY Details That Make the Chair Feel Luxurious
The furniture does not need to be surrounded by expensive décor to create a premium-looking corner. Instead, use a few coordinated elements to make the luxury pedicure chairs look like part of a planned interior.
Start with the wall behind or beside the chair. A textured paint finish, wood-effect panel, framed artwork or simple decorative treatment can visually define the pedicure area.
Then coordinate the smaller pieces around it. A trolley in a complementary finish, a compact side table and neatly arranged towels can make the space look intentional rather than improvised.
Lighting can also help separate the pedicure corner from the rest of the salon. Use brighter task lighting where the technician works and softer ambient lighting around the client area. Try this three-step styling method.
-
Define the backdrop
Choose one wall or section as the visual background for the chair. Avoid decorating every wall because too many competing elements can make a small room look busy.
-
Coordinate the furniture
Match the finishes of the technician stool, trolley and storage with the chair and surrounding interior. They do not have to be identical, but they should look visually connected.
-
Keep surfaces uncluttered
Display only the products needed for the treatment. Store backup stock, packaging and extra equipment elsewhere. A clear working surface makes even a compact station look more refined.
A dedicated pedicure zone with coordinated furniture and lighting is also commonly used to give smaller salon spaces a distinct treatment identity without completely closing them off.
Build Cleaning Into the DIY Setup
A DIY pedicure corner should be designed around the cleaning routine from the beginning. This is particularly important when using a separate foot soak bowl, as the soaking area will need to be emptied, cleaned and prepared between appointments.
Keep cleaning supplies close enough for the technician to access them without leaving the treatment area. At the same time, store them separately from clean towels and service products.
The chair and surrounding surfaces should also be easy to wipe down. Avoid placing decorative objects directly beside areas that are likely to receive water splashes. Create a simple between-client reset.
- Remove used items: Take away used towels, disposable materials and products.
- Empty the soaking area: Remove used water and any visible residue.
- Clean the bowl: Wash and rinse it according to the manufacturer’s instructions.
- Disinfect as required: Use a suitable product according to its label directions.
- Clean contact surfaces: Wipe the chair and frequently touched areas using appropriate products.
- Dry and restock: Return clean towels and essential supplies to their designated places.
- Prepare for the next appointment: Check that the technician has everything needed before the next client arrives.
The same principle should guide the overall design: cleaning should not be an afterthought. A soaking station that is difficult to access or a trolley buried behind the chair will make every appointment harder to reset.
Conclusion
With the chair as the anchor, a separate soaking zone and a few carefully selected DIY design elements, even a compact salon can create a polished pedicure corner. The goal is not to fill the space with expensive additions but to make the luxury pedicure chairs and surrounding setup work together as one practical treatment area.