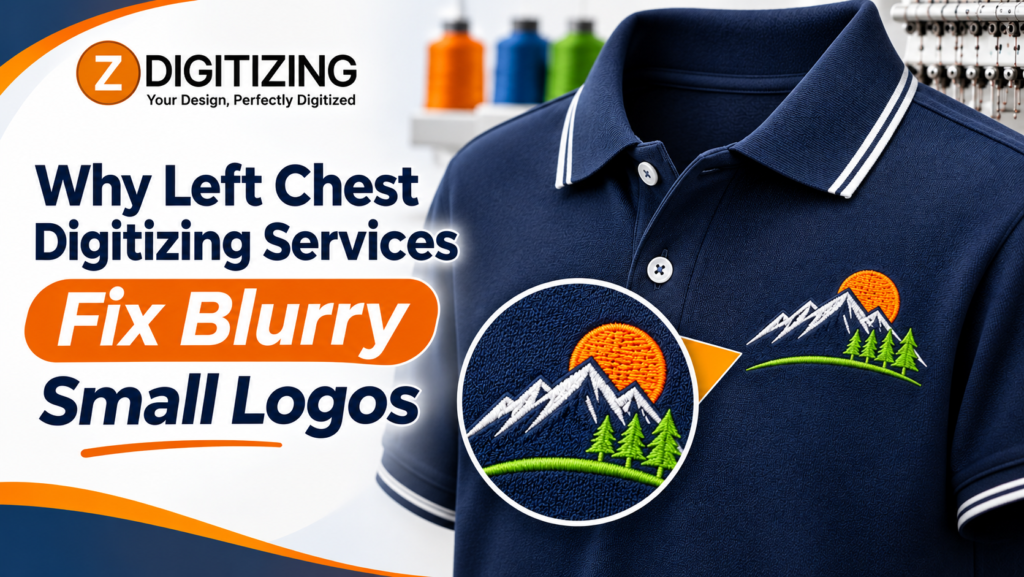

A small logo on the left chest can make a uniform look professional, but stitching a detailed design in a limited space takes careful preparation. Left Chest Digitizing Services convert your artwork into a machine-ready embroidery file with attention to lettering, stitch direction, density, and placement. At ZDigitizing, we understand that a logo must remain recognizable when stitched on polos, shirts, jackets, and workwear. Our Professional left chest embroidery services focus on preparing artwork for this specific embroidery area and its practical requirements.
A design that looks clear on a computer screen may not sew the same way on fabric. Small text can become difficult to read, thin outlines can disappear, and dense areas can feel stiff. In this guide, we explain how left chest digitizing works, what affects stitch quality, and what information you should provide before ordering.
What Are Left Chest Digitizing Services?
Left Chest Digitizing Services turn a logo, name, or other artwork into a digital embroidery file that tells an embroidery machine how to stitch the design. The digitizing process assigns stitch types, directions, density, underlay, and sewing sequence to different parts of the artwork.
The left chest area is commonly used for company logos, staff uniforms, school apparel, sportswear, and branded clothing. Because the available space is relatively small, every design element needs to be considered carefully. A logo with tiny lettering or complex details may need adjustments to remain clear after stitching.
Digitizing is not simply converting an image into a file extension. It involves planning how thread will build each shape on the selected garment. The final file should reflect the design dimensions, fabric characteristics, and embroidery machine requirements.
Why Does Left Chest Embroidery Need Special Attention?
Left chest embroidery has limited space, so small design decisions can affect the finished appearance. We consider several important factors when preparing a logo for this location.
Small Text and Fine Details
Company names, taglines, and small lettering can be difficult to reproduce at a reduced size. If letters are too narrow or close together, thread may fill the gaps and make the words harder to read.
We recommend reviewing the smallest text before digitizing. Some artwork may need a simpler font, slightly larger lettering, or fewer decorative details. The goal is to preserve the most important parts of your logo without forcing every tiny element into an unsuitable size.
Fabric and Garment Type
A logo may be stitched on a polo shirt, cotton shirt, fleece jacket, or another garment. These materials do not all behave the same way during embroidery. Stretchy or lightweight fabric may move differently from a stable, heavier material.
The garment type can influence the stabilizing approach, underlay, and stitch coverage. When you request Professional left chest embroidery services, provide the garment information whenever possible. This helps establish the conditions the design needs to accommodate.
Logo Size and Placement
The left chest position should look balanced with the garment’s shape, seams, buttons, and pockets. A design that is too large may look crowded, while one that is too small may lose visibility.
Before digitizing, confirm the intended width and height. Also explain whether the logo will appear on men’s, women’s, or children’s garments, since garment proportions and placement requirements can differ.
How We Prepare a Logo for Left Chest Embroidery
A well-prepared file begins with understanding the artwork and how you intend to use it. Here are the main considerations involved in preparing a design.
1. Review the Original Artwork
We start with the logo or image you want to embroider. A clean vector file is useful because it preserves clear shapes, while a high-resolution image can also provide a helpful reference.
During the artwork review, consider:
- Whether the lettering is readable.
- Whether small gaps and shapes are large enough to stitch.
- Whether outlines are clear.
- Whether the colors and design elements are easy to distinguish.
- Whether the artwork contains details that may need simplification.
If your logo includes a thin slogan beneath a larger symbol, the slogan may require a separate size or design adjustment. It is better to identify these limitations before the file is prepared.
2. Select Suitable Stitch Types
Different parts of a logo may require different stitch types. Satin stitches are commonly used for lettering and narrow shapes. Fill stitches can cover wider areas, while running stitches may be suitable for selected outlines and fine details.
The digitizing approach should match the shape and dimensions of each element. For example, a wide fill stitch may not be suitable for narrow lettering. Choosing an appropriate stitch type helps maintain the design’s definition and avoids unnecessary thread buildup.
3. Plan Underlay and Stitch Density
Underlay stitches create a foundation beneath the visible embroidery. They can help support the top stitches and stabilize the design, depending on the fabric and construction.
Stitch density also needs attention. If stitches are too close together, the embroidered area may become bulky or stiff. If density is too low, the garment may show through the design. There is no single setting that suits every logo and fabric combination.
We consider the artwork dimensions and intended material when planning these details. A test stitch-out can then help reveal whether the file needs further adjustment.
4. Organize Stitch Direction and Sequence
Stitch direction affects how thread covers each shape and how adjoining sections meet. The sewing sequence determines which parts of the design are stitched first and how the machine moves between them.
A carefully planned sequence can help reduce unnecessary movement and support better alignment. It also matters when a logo contains overlapping shapes, borders, or multiple colors.
For example, if a design has a colored center with an outline, the digitizing plan should account for how those sections connect. The right sequence depends on the artwork rather than a universal rule.
5. Prepare the Required Machine File
Once the design has been digitized, it must be saved in a format compatible with the embroidery machine. Common embroidery formats include DST, PES, and EXP. The correct choice depends on the machine and software used for production.
Before placing an order, tell us which format you need. Also provide the final design dimensions and intended garment type. These details help avoid confusion when the file is ready for use.
Common Problems With Left Chest Logo Embroidery
A design can encounter problems when artwork, digitizing, or production settings do not suit one another. Some common issues include:
- Unreadable lettering: Text that is too small or narrow may close up during stitching.
- Uneven outlines: Poor alignment or unsuitable stitch planning can affect the edges of letters and shapes.
- Excessive thread buildup: Too much density can create bulky areas and make the garment feel stiff.
- Fabric showing through: Insufficient coverage or unsuitable stitch settings may leave unwanted gaps.
- Incorrect placement: A logo positioned too close to a seam, pocket, or button line may look unbalanced.
- File compatibility problems: An embroidery machine may not recognize a file saved in an unsupported format.
Not every stitch-out problem comes from digitizing. Thread tension, needle condition, hooping, stabilizer choice, and machine setup can also affect the result. If an issue appears, review the file and production conditions together before making changes.
What Should You Provide Before Ordering?
To help us understand your project, prepare the following information before requesting Left Chest Digitizing Services:
- Artwork: Send your logo in a clear image or vector format, if available.
- Design dimensions: Specify the intended width and height.
- Garment type: Tell us whether the logo will be stitched on a polo, shirt, jacket, fleece, or another item.
- Fabric details: Share the material information if you know it.
- Required file format: Confirm the format supported by your embroidery machine.
- Special details: Mention small text, outlines, color changes, or other elements that must remain recognizable.
Providing these details gives the digitizing process a clear starting point. If you are unsure about the final dimensions, explain how the garment will be used so the design requirements can be reviewed.
At ZDigitizing, we encourage you to share the intended application along with your artwork. Clear project information helps us understand what the embroidery file needs to accommodate.
How Can You Check the File Before Production?
Before embroidering a full order, review the design preview and, where possible, test the file on the intended garment. A digital preview can help you inspect the layout, but a sample stitch-out shows how the thread behaves on the actual material.
Use this checklist during your review:
- Is the logo easy to recognize at its final size?
- Can you read the smallest lettering?
- Are the outlines and borders properly aligned?
- Does the design fit the available left chest area?
- Is the stitch coverage suitable for the fabric?
- Does the file open correctly in the embroidery software?
- Does the sample look balanced when worn?
If the test reveals a problem, identify whether it comes from the digitized design or the machine setup. Making adjustments before bulk production can help prevent the same issue from appearing across multiple garments.
Prepare Your Logo for a Professional Left Chest Stitch-Out
A clean left chest logo depends on more than the original artwork. Design size, lettering, fabric, stitch type, density, underlay, and placement all influence how the finished embroidery looks. Careful preparation helps keep the logo readable and balanced within the available space.
If you are preparing uniforms, branded shirts, or workwear, ZDigitizing can help you explore the appropriate digitizing option for your artwork. Share your logo, garment details, dimensions, and required machine format so the project requirements are clear before production begins.
Frequently Asked Questions
What is the best size for a left chest embroidered logo?
The suitable size depends on the garment, logo proportions, and intended appearance. There is no universal measurement for every design. We recommend confirming the available embroidery area and checking that the smallest lettering and details remain readable at the selected dimensions.
Can detailed logos be digitized for left chest embroidery?
Yes, but some details may need to be simplified or adjusted to suit the smaller embroidery area. Very fine lines, tiny text, and narrow gaps may not reproduce clearly when stitched. We recommend reviewing the artwork at its intended size before digitizing.
Which file format is used for left chest embroidery?
Common machine embroidery formats include DST, PES, and EXP. The correct format depends on your embroidery machine and software. Tell us which format your production setup requires so the file can be prepared accordingly.
Why does my left chest logo look bulky after embroidery?
Excessive stitch density, unsuitable underlay, overlapping stitches, or the fabric itself may contribute to a bulky result. Review the digitizing settings and test the design on the intended garment. Machine tension and stabilizer choices can also affect the finished appearance.
What information should I send for left chest digitizing?
Provide your logo artwork, desired dimensions, garment type, fabric details if known, and required machine file format. Also mention any small text or design elements that must remain clear. These details help establish the requirements before the embroidery file is prepared.